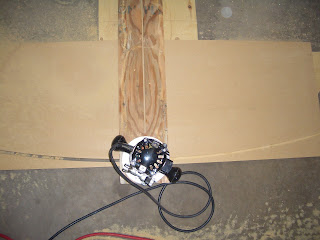
The process we used is as follows:
• Joint the edges of the two boards
• Position and use the router to place 4 biscuits (extra strength)
• Dry fit to ensure that everything is right (expand the size of a couple biscuit slots because they are too small)
• Mix and apply epoxy
• Slather biscuits with epoxy and slide them into one side of the board
• Apply epoxy to the rest of the board edge
• Push the boards together and gently lay them down on the top of the table saw (with wax paper under the joint)
• Clamp the boards to each other and also down to the table saw top (nice and flat)
• Wait
Once the epoxy was dry we unclamped it and had the good fortune to take it to my son’s shop class to run it through a brand new General thickness sander. Tam, if you are following along on our blog, thanks again for this kindness, it really saved us a bunch of time and the end result was far superior to anything we could have done with our tools.
Here is a picture of the end product. Can you see the line? Or is it one board?
Now the real fun gets started. Willy calls for a top curve on the transom, but the plans do not show the radius of this curve only that the center will be 2” higher than the side height. Scaling the curve of the plans showed a radius of 84” so I knew that a large trammel would be in order. Working with scrap pieces of plywood for the trammel I gradually worked my way up to a radius of ~120” before the center was 2 ¼” higher than the middle and that is where I decided to stop the madness.
Hereare the pictures of the trammel jig for my router.
The transom is a complex board with many angles that have to be cut. On Willy the transom is slightly angled backwards from the stem of the boat and of course it is significantly wider at the top than the bottom. All of which means that the sides of the transom are complex angles (up and down--height, and front to back--thickness). To determine these angle we went back to the lofted plan to determine the side angles and to the plans to get the front to back angle.
Using the table saw the blade was set at the correct angle 10 degrees, and the transom was held down on the sliding table at an angle. Lots of care needs to be taken at this step or you will end up with one of the beveled angles going the wrong way. I wish I had taken a picture at this stage to help you visualize.
Cut the board without problems and then trial fit it to the boat. It was clear that the front to back angle was wrong, thankfully we could just remove more material. So back to the table saw, change the angle ( a bit of a guess now) and re-cut. Whew, it all worked out.
Lots of steps to get to this point but it was nice to finish up and to screw the transom to the chines on the boat. Next up planking.


No comments:
Post a Comment