Thursday, March 11, 2010

Strongback - Adding the Transom Support

Today's boat building activities consisted of adding the transom support to the strongback and sharpening plane blades for the job ahead.

I am sure that professional boat builders have a method of attaching the transom to the strongback without driving a fastener through the transom that would have to be plugged later.  We were unable to figure out that method from either our readings or from the internet so we have elected to add a plywood sub-transom (a new boating term no doubt!!)  frame to which we can clamp the real transom.  To do this, we first attached a couple of sister joists to our strongback with the appropriate angle cut in them for the transom (Picture 1).  The plywood sub-transom was leveled and screwed to the sister joists (Picture 2).  

Sharpening is an art form from simpler times when tradesman used hand tools--chisels and planes to fashion wood.  Traditionally these tools were sharpened on oiled stones in the West (North America and Europe)and water stones in the East (Asia).  It wasn't until recently that I learned how to really get my tools sharp from my son who learned from his woodworking shop teacher.  Here is the process I now use;

1. Use an electric wet stone to put a concave 25 degree bevel evenly across the whole blade.  Even though this may sound hard it really isn't, you establish the angle between the tool rest and the wheel and then slowly move the blade across the stone (I find it is easier if the stone turns towards me).  You can see your progress and the evenness of your cut after each pass and you adjust accordingly until you have ground the blade all the way up to the tip.

2. Turn the electric wet stone off and clean off the blade.  Now you need to put a micro bevel on the blade.  To do this I use adhesive backed silicon carbide 3M micro-abrasives (sandpaper) from Lee Valley Tools that I have attached to a flat piece of plate glass.  It is easiest to use a jig to hold the blade but if you don't have one you can still apply the micro bevel by hand.  All you do is increase the angle on the blade slightly and make several passes back and forth on the sandpaper until it is super sharp.  I generally start with 15 micron and then finish up with 5 micron.  

3. Go cut some wood by hand and enjoy the satisfaction of a sharp blade and the silence of non-electric motor cutting.

I sharpened blades for a block plane and an ancient jack plane today using this method and both planes will now cut long thin curls in both red oak and spruce.   

Joe Lap       


Monday, March 8, 2010

The Great Rivet Debate

It appears that everyone has their own opinion regarding the use of rivets and burrs/roves on a lapstrake craft. Although there is a general consensus that rivets are the go-to fastener for laps, that is where the agreement ends. Here we encounter two different schools of thought: Roves or Rivets. Those who use roves argue that these conical washers compress slightly upon peening the nail, increasing tension on the joint. According to some sources, they are also more traditional on European boats. However, roves are significantly more expensive than their counterparts, and they also leave unsightly lumps on the inside of the craft. Burrs have the advantage of being more streamlined, and, if used properly, can still create a sound joint. A "tight fit" burr allows a tightening of the joint similar to, if not quite as strong as the rove. As we learned from the Woodenboat Forum, some Icelandic boatwrights traditionally use copper coins in the place of burrs. Sounds crazy, but, hey, it works! There are boats still in the water to prove it. Burrs are also much more economical than roves (although not quite as cheap as pennies). So where does this leave us? Each has to make his/her own decision. We have decided, being a little cheap, that we will use burrs. In addition to their inexpensive nature, we are looking to avoid the lumps that roves would cause on the interior of Willy. Any other comments regarding the history and/or adequacy of each of these methods are welcome.

Joe Lap

Strongback Construction

As we mentioned yesterday, the strongback has recently been completed. After taking a few photos today, we figured that we should explain the strongback in detail. We chose to go for a design that raised the molds high off the ground, as we will have to work inside the ship while riveting (and we are both over 6' tall). On a similar note, the stringers attaching the legs make a very convenient tool rest. Once the planks go on, they will also function as a seat for the man peening rivets inside the boat. This model allows the molds to sit at about chest height, a comfortable working position. The molds are 2 by construction, reinforced at the corners using ply. Although simple, they are very sturdy. The rocker in Willy's hull becomes more evident now that the strongback is assembled. The second photo illustrates the method used to connect the molds to the back--a detail overlooked in most books. It also demonstrates the technique used to fit chines at each station. A basic positioning system allows the builder to quickly square and level each mold before attaching it. Chines will be made of 3/4 x 1 1/2 red oak. The spaces for chines to run over each mold were cut using a dozuki saw and chiseled to fit the chine. That saw is perhaps one of the finest (and fastest) cutting handsaws that we have ever seen. As far as value in a general-purpose saw goes, this one can't be beat. For the woodworker, it also excels at cutting dovetails. The strongback still needs to be modified to accept the stem and stern (both yet to be built--need to find suitable material). Any suggestions regarding stem/stern material choice? The sides will lapped with 3/8" mahogany (NOT ply), but we still need material for the cross-planked bottom (tentatively 3/4" cedar). As we approach the purchase of fasteners and bedding compounds, we will focus on a few common debates regarding choices for the next few days. Photos of the strongback are below.

Joe Lap


Sunday, March 7, 2010

Introduction


Hello all;


This blog will document the building of a small wooden sailboat. As we are amateurs (this is our first boat), we hope that this will be an opportunity to share our knowledge and learn from others.

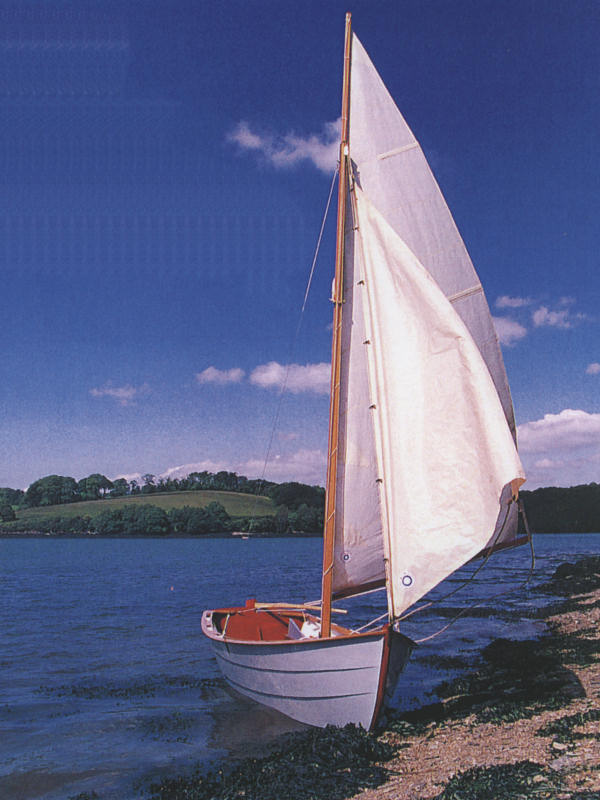
We have chosen to build John Atkin's Willy Winship, a 13' 9'' flat-bottomed sailing skiff.
We ordered the plans for Christmas from the Woodenboat Store in December and have been studying them and reading many boatbuilding books in preperation for the build. In fact, we highly recommend Greg Rossel's The Boatbuilder's Apprentice, as it is straightforward to understand and very applicable to any small boat.

Excited about the build before us and anxious to get our hands dirty, we plunged right in and began the first mold (without lofting first). First lesson: Loft First! After some frustration with the inaccuracy of the unlofted mold, we decided to loft the next four. Although we had been somewhat anxious about the lofting process by the many complex explanations outlined in some books (including using multiple sheets of ply and/or the floor of a room), we discovered that, to our delight, it was a simple and enjoyable process. All that we needed was a square, a good rule, the back of a laminate desktop, and a few pencils. Because Willy is a flattie, she has relatively simple lines. After building four of the molds to the lofted plans, we found that the process was so superior that we lofted and rebuilt the first mold.

Seeing that the weather here was so beautiful this weekend, we decided to construct our strongback--the spine on which the boat will be built. It is a rather simple affair, consisting of a couple 2x10's and the aforementioned molds, but it is rock-solid! Another word of advice: ensure that any strongback (and each mold) is level and square before moving on. After all, this is the platform on which the boat will be built--small mistakes here will translate to the finished project.

So, that's about as far as we've gotten so far. Hope to post a few photos of the set-up and any new progress soon. Any advice is welcome.


Joe Lap